About
The nRF24L01+ wireless transceiver board allow for wireless communication between two or more radios at distances greater than Bluetooth or standard WiFi. This tutorial includes an overview of the different types or radios available in the store, wiring the radios to an Arduino, an example sketch that allows for two way communication, and finally tips and tricks to increase your success with the radios.
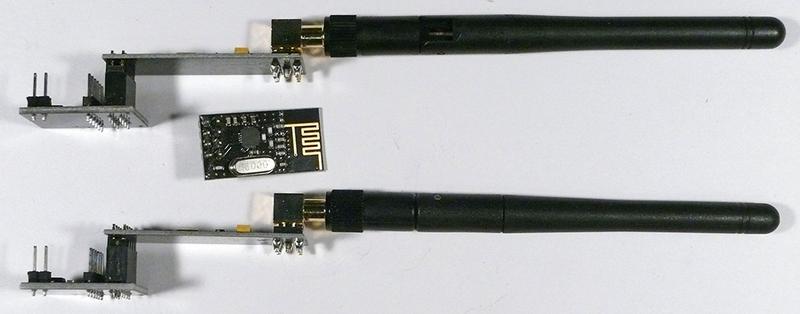
Purchasing
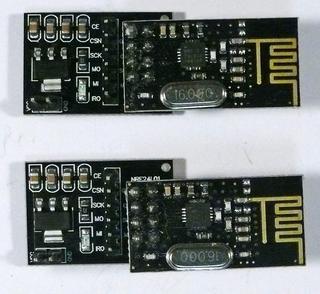
There are two versions available in the UCSB ECE store. They also can be purchased on the yourduino website (http://www.yourduino.com/sunshop/) The high power transceiver has amplifiers and an external antenna. It has been tested to work at ranges in excess of 350 meters. The low power transceivers have an internal antenna and work at about 20 meters. The two different types can work together. Se the tips and tricks section for more info.
Installation
This library requires thmr20's radio driver. Both can be found in the Arduino repository.
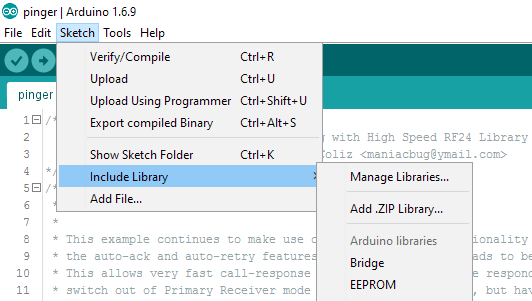
First, go to sketch→Include Library→Manage Libraries...
The library manager will show as an additional window.
Next, add the latest version of the RF24G library.
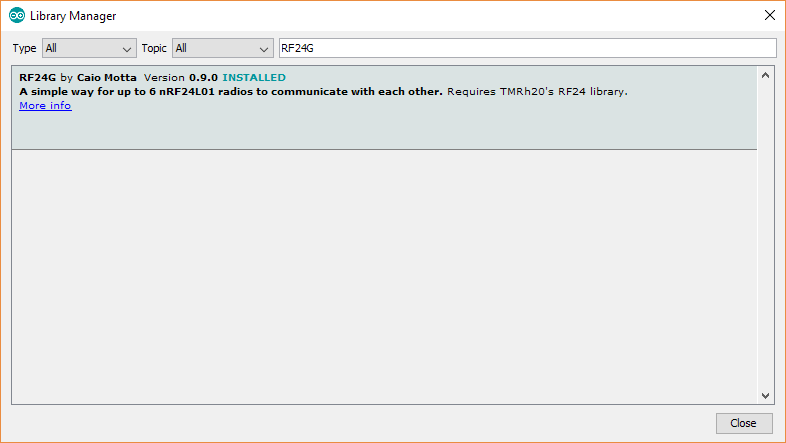
Press install.
It should prompt you to install the nrf_to_nrf and RF24 libraries as well
Wiring
This tutorial assumes you are using nrf52x modules or the RF24 modules sold here: http://yourduino.com/sunshop//index.php?l=product_detail&p=489
recouses for this tutorial are based on Terry's instructions at https://arduino-info.wikispaces.com/Nrf24L01-2.4GHz-HowTo
First, attach the either the high power or low power radio module to the base module
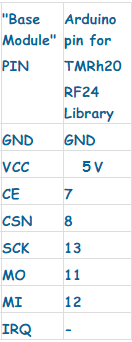
Next, connect jumpers between the Arduino and the base module using this table